


Technical Tip: Creating a Web Filter profile with user authentication
Description
This article describes how to configure user authentication for a specific FortiGuard Web Filter category.
Scope
FortiGate, Web filter.
Solution
Requirements:
- A valid FortiGuard Web Filter license.
- An authentication server: Local, LDAP, or RADIUS.
- An active connection to FortiGuard.
- User Group:
Configure a specific user group. It can be Local, LDAP, or RADIUS. For this exercise, a Local user group will be used.
Note: FSSO and SAML user groups are not supported for now.
- To create a user: go to User & Authentication -> User Definition -> Create New -> Local User -> Enter a username + password -> for Two-factor choose 'none' -> Select Finish.
- Create user group: go to User & Authentication -> User Groups -> Create New -> Name, enter 'Firewall', and for members, choose 'select previously created', then select OK.
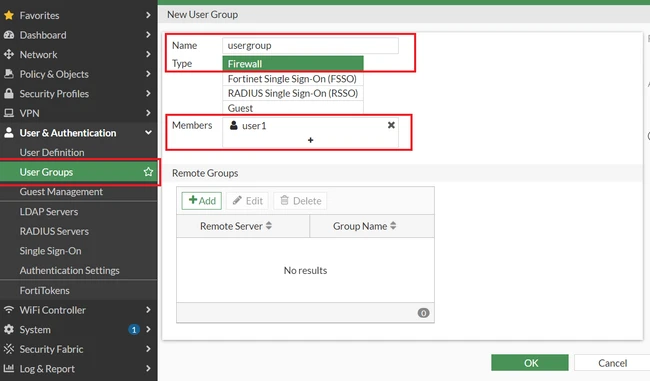
Note: The user group can be LDAP or Radius.
- Web Filter profile:
Go to Security Profiles -> Web Filter -> Create New -> Name, FortiGuard Category Based Filter -> Select Category -> Authenticate.
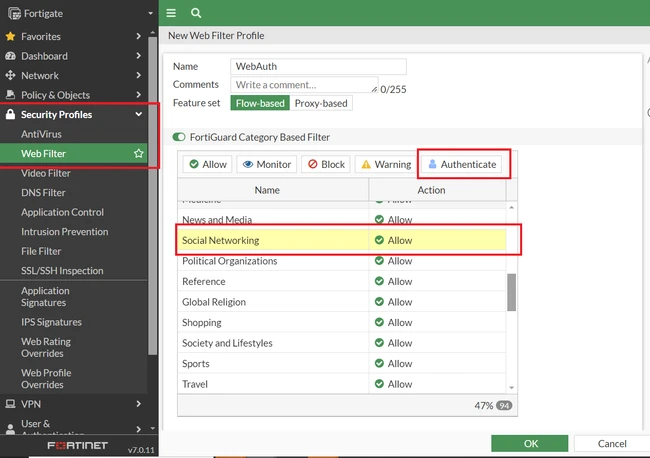
For this example, a social network is used.
After selecting the user group created in point 1, define the time range for the warning interval in hours, minutes, and/or seconds. Select OK.
Note: This warning level will define the interval after which the timer will expire. In this particular example, after 2 hours, the user will no longer be able to access the website until the authentication happens again. This case will hold particularly for streaming platforms such as YouTube, where the video will stop after two hours.
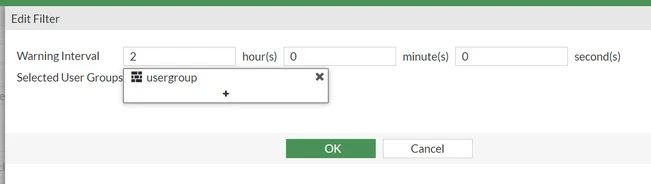
After, remember to select OK in the next screen to save the Web Filter Profile.
CLI reference:
Use the following command to see the website category ID:
get webfilter categories
Set the category to authenticate and add the user group.
config webfilter profile
edit "default"
config ftgd-wf
config filters
edit 36
set category 37
set action authenticate
set warn-duration 2h5m
set auth-usr-grp "usergroup"
next
end
end
next
end
- Firewall Policy:
Create a firewall policy and select the Web Filter 'WebAuth' profile created in point 2.
- Name: WebAuthTest.
- Incoming Interface: LAN.
- Outgoing Interface: WAN.
- Source: all.
- Destination: all.
- Service: all.
- NAT: Enabled.
- Web Filter: WebAuth.
- SSL Inspection: Certificate Inspection.
- Test:
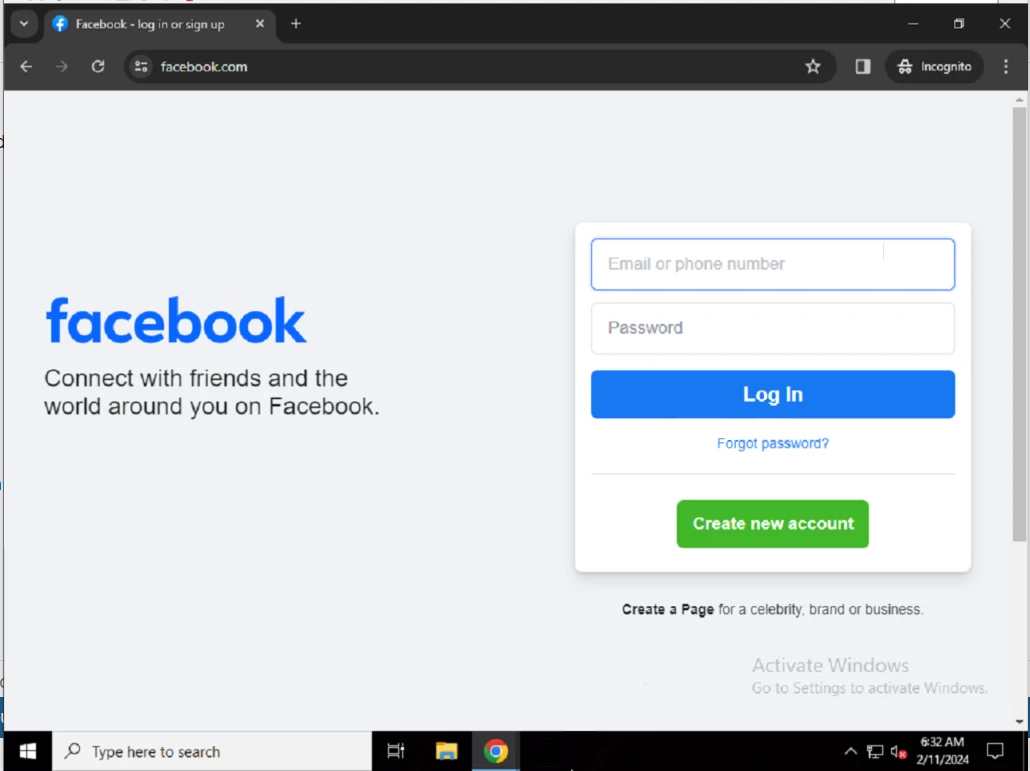
Open a web browser and try to reach any site belonging to a category such as Facebook. A certificate error may appear: to prevent this, install the Fortinet_CA_SSL certificate as a trusted root certificate in the PC.
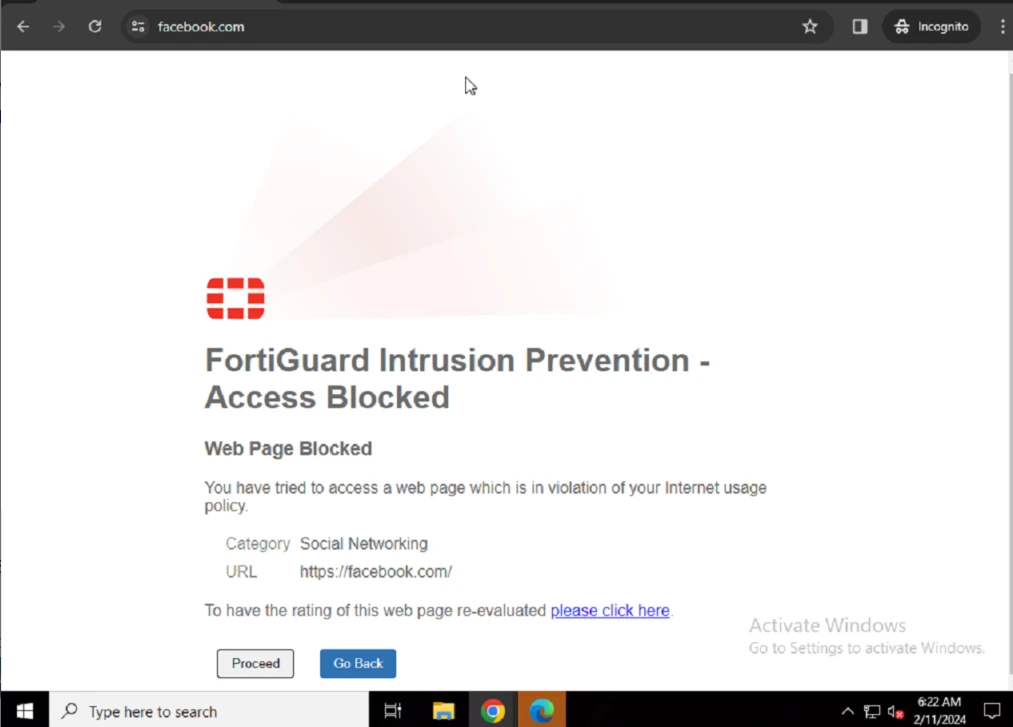
Select Proceed and authenticate with user credentials.
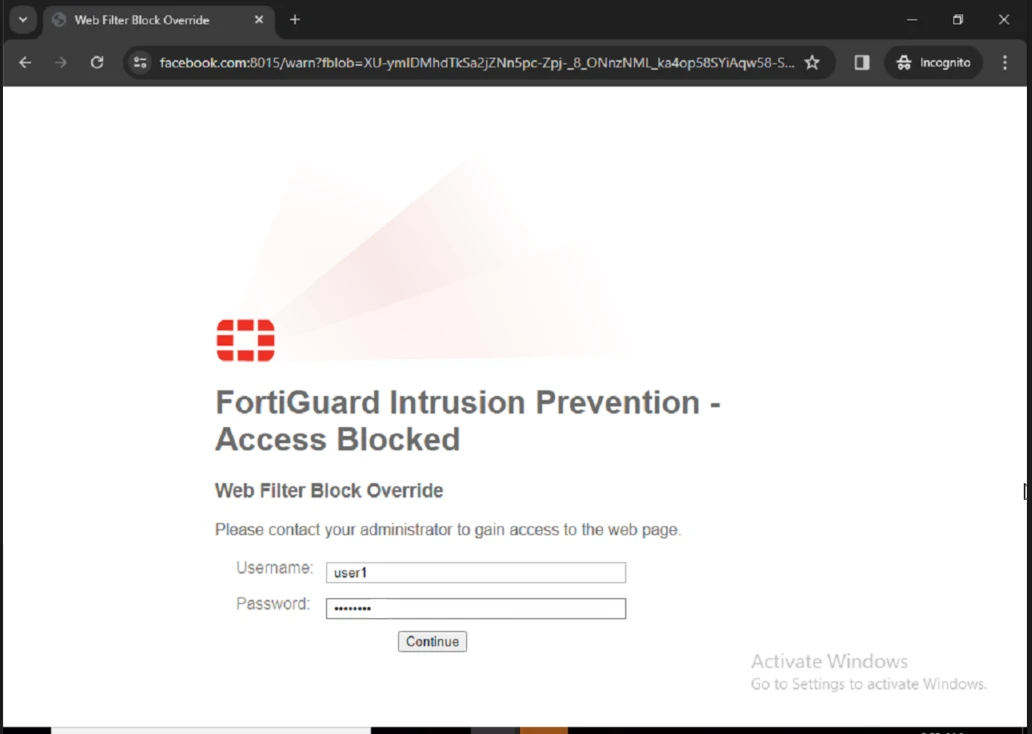
If authentication is successful, access will be allowed.
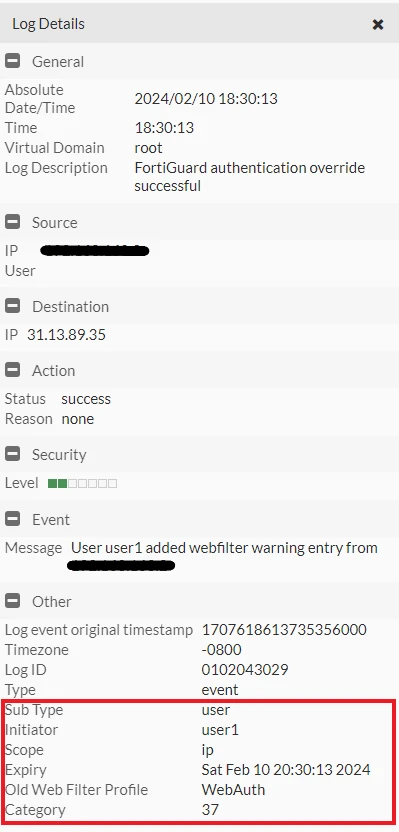
- Log:
Go to Log & Report -> Events -> User Events.
Notes:
- The policy inspection mode should be set to 'Proxy-based' in v7.2.x and v7.0.x.
- Starting from v7.4.4, this functionality will work with policy inspection mode set to 'Flow-based'.
- With FIPS-CC enabled, this feature is available in v7.4.8+ with Proxy-based inspection.
If authentication is failing for external servers like LDAP or FSSO servers, use the below debugs:
diagnose debug disable
diagnose debug reset
diagnose debug console timestamp enable
diagnose debug enable
diagnose debug application fnbamd -1
diagnose debug application authd 8256
diagnose debug disable -> To disable debug.
diagnose debug reset -> To reset the debug filter.
Related documents:
